
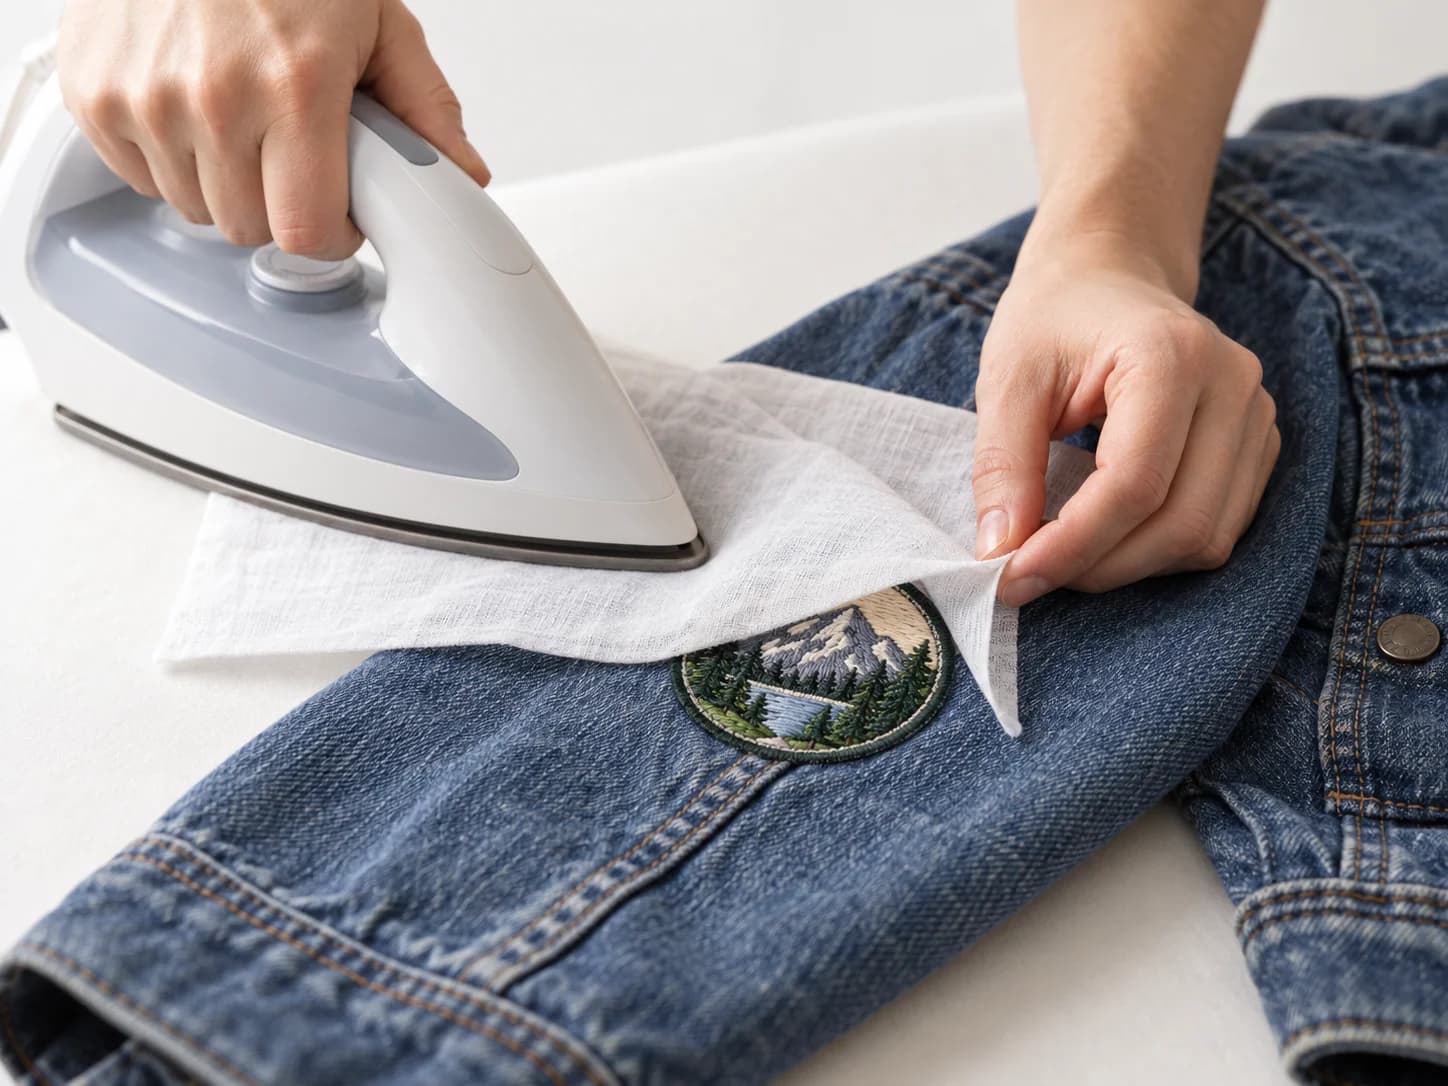
Iron-on patches have a heat-activated adhesive on the back, so there's no sewing involved. Heat and pressure activate the glue, and it grips the fabric fibers as it cools. A household iron is the usual tool, a heat press does the job even better, and sewing is the fallback if you have neither. Below are all three, plus the fabrics that hold a patch well.
How to apply an iron-on patch with a clothes iron
- 1Pre-wash and dry the garment. Skip fabric softener, because it leaves a coating that weakens the adhesive bond.
- 2Lay the garment flat on a hard surface. A padded ironing board is fine, but a solid table with a thin towel gives more even pressure.
- 3Position the patch adhesive-side down where you want it.
- 4Place a thin cotton pressing cloth (or a pillowcase) over the patch. Never press directly onto the patch face.
- 5Set your iron to medium-high, about 175°C (350°F). No steam.
- 6Press down firmly and hold for 15 to 20 seconds. Add about 5 seconds for a thick patch. Don't slide the iron. Hold it still.
- 7Lift straight up. Let the patch cool completely before touching it.
- 8Turn the garment inside out and press from the back for an extra 10 to 15 seconds to reinforce the bond.
If the edges lift after cooling, press each edge again on its own with firm downward pressure. Our iron-on backing is heat-activated, so it needs both heat and pressure to bond. If your patches came with their own care card, follow that over this guide.
How to apply an iron-on patch without an iron
You have two practical options.
Option A: Heat press (recommended)
A heat press gives more consistent pressure and even heat across the whole patch, so the bond is stronger than with a household iron.
- 1Pre-wash the garment, no fabric softener.
- 2Place the garment flat on the lower platen.
- 3Position the patch adhesive-side down.
- 4Cover with a pressing cloth or a Teflon sheet.
- 5Set the press to about 175°C (350°F).
- 6Close the press and hold for 15 to 20 seconds.
- 7Open it, and let the patch cool flat. Press from the reverse side if needed.
If you are applying patches in volume (for a team, club, or small business), a heat press is worth the investment. It saves time, and the results are more consistent than an iron.
Option B: No heat tool at all
Without an iron or a heat press, the adhesive won't activate, so sewing is your best option. Stitch around the edge with a needle and thread, using a basic whip stitch or a straight stitch. That hold lasts longer anyway. If you already know ironing isn't an option, you can order sew-on or velcro backing instead.
Best fabrics for iron-on patches
Iron-on adhesive bonds best to:
- Cotton is the most reliable surface.
- Denim holds well, and is common for jacket and jean patches.
- Canvas works for bags, totes, and structured hat panels.
- Polyester blends are usually fine, but test a small area first at lower heat.
Where iron-on adhesive struggles or fails:
- Nylon and waterproof shell jackets, where the coating blocks adhesion.
- Leather and faux leather, where heat can damage or discolor the surface.
- Very thin or stretchy fabrics, where the bond breaks when the fabric flexes.
- Unstructured hat crowns, where curved surfaces make even pressure hard to get.
For leather garments, Custom Embroidered Patches with sew-on backing or Custom Woven Patches with sew-on backing are the more durable choice. For hats, Custom Chenille Patches are commonly used on structured panels.
Dressing up for Halloween or decorating a hoodie? Cotton pieces take iron-on backing well. Many costumes are polyester, so follow the polyester note above and test a hidden spot first. For design ideas, see our Halloween patches.
Iron-on backing is available on embroidered, woven, PVC, and chenille patches. Custom Iron-On Patches covers the backing options we offer, and you can also look at Custom PVC Patches directly. There's no minimum order, and you approve a free digital proof before production starts.
Related products
Custom Iron-On Patches · Custom Embroidered Patches · Custom Woven Patches · Custom Chenille Patches · Custom PVC Patches
Written by Jerry Wilson. Last reviewed October 2026.