
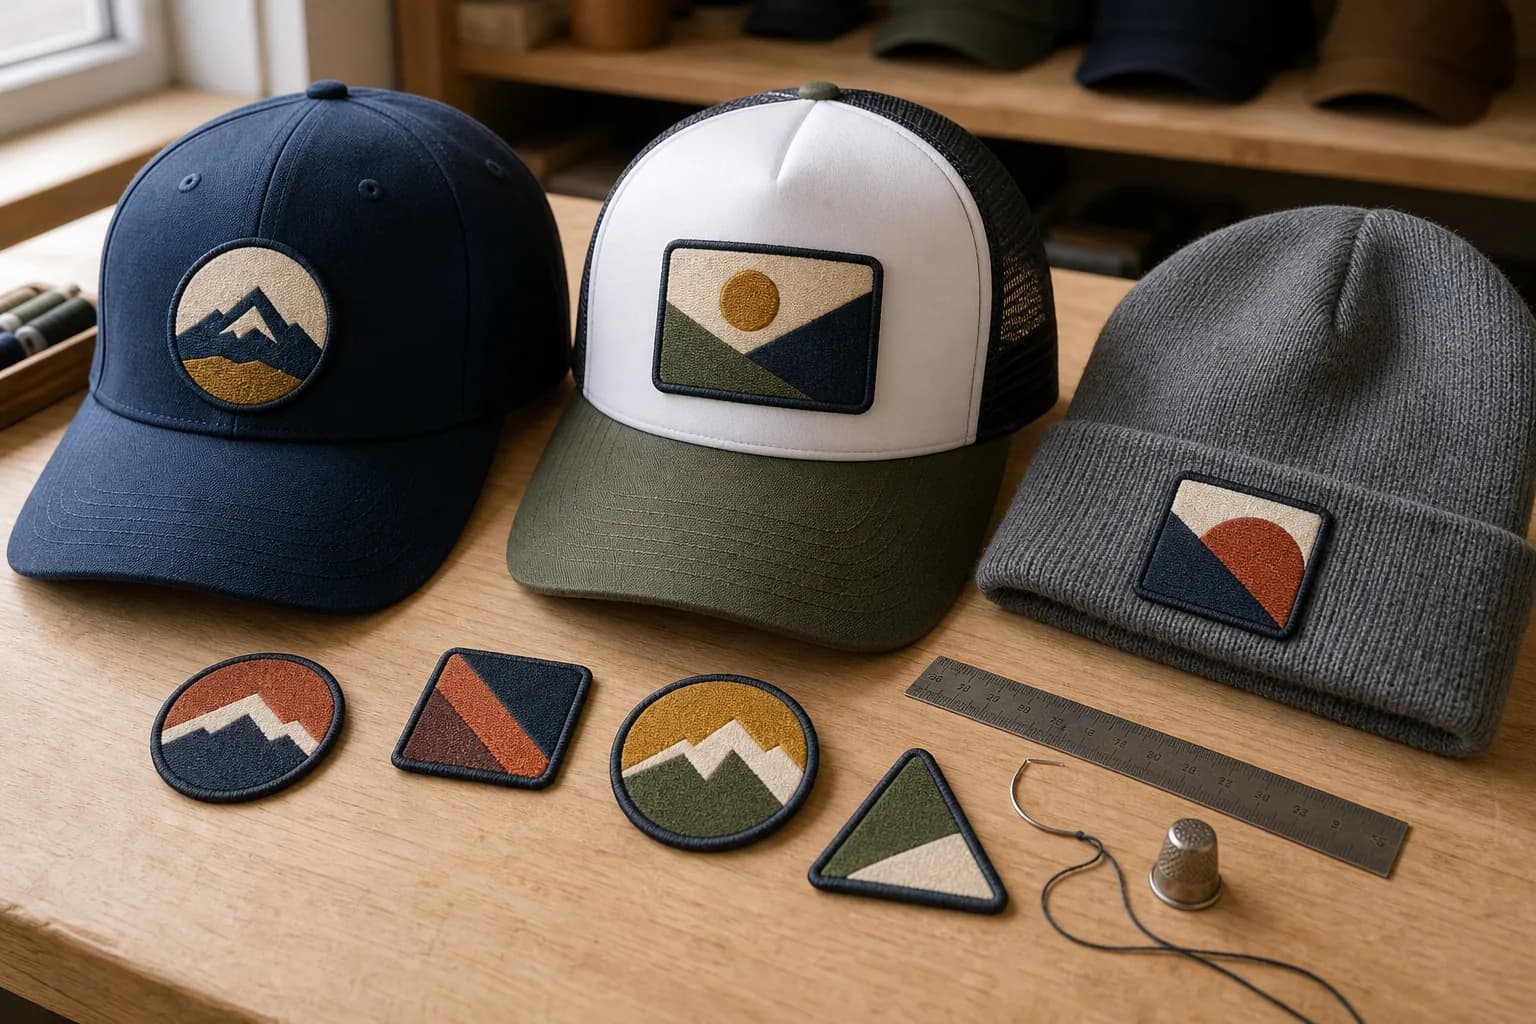
Match the patch to the cap. Embroidered patches suit most structured caps (the stiff-fronted kind that hold their shape), PVC works on rugged outdoor hats, and woven handles fine detail. For the front panel, 2 to 2.5 inches wide is the sweet spot, and sew-on is the most secure attachment. Beanies and bucket hats usually need smaller, flatter patches.
Which patch type works best on a hat?
There's no single winner. The right type depends on the hat's fabric, how detailed your design is and where the hat will be worn. Here's the honest rundown.
- Embroidered patches are the safe default. They're textured, tough and look right at home on cotton twill, the tight, slightly ribbed fabric most caps use. The tradeoff is thickness. A large, dense one can feel stiff on the front of a structured cap.
- Woven patches use finer thread, so small text and detailed logos stay sharp. They're flatter and lighter than embroidered, which helps on soft caps. They just don't have the raised, stitched look.
- PVC patches are raised rubber. They're weatherproof and hold bold colors, so they suit work hats, outdoor hats and tactical-style caps. They're also stiff, and they can pull or curl on a soft, floppy hat.
- Leather patches give a rugged, classic look on dad hats, beanies and trucker caps. They work best with simple designs, like a short name or a single mark, because leather loses very fine lines.
- Chenille patches have a fuzzy, varsity feel. They're bulky, so they usually look better on a jacket than a hat.
If you're not sure, start with embroidered. If your logo has tiny lettering, go woven. You can browse every option on our custom hat patches page.
What size patch fits a hat?
A patch that's too big looks like a sticker slapped on the front. One that's too small gets lost. These are common ranges, not rules, so treat them as a starting point.
Our usual advice for a cap front is 2 to 2.5 inches wide. Past about 3 inches wide, a patch starts to buckle and lift on the curve.
- Front panel of a structured baseball or trucker cap: 2 to 2.5 inches wide is ideal. A structured cap holds a slightly larger patch flat, up to about 2.5 by 3 inches.
- Unstructured (dad) hats: 2 to 2.5 inches. The soft crown is happy with anything from 1.5 to 3 inches, as long as the patch is flexible.
- Side of a cap: 1 to 2 inches. Small logos and icons look good here.
- Back of a cap, above the strap: 1.5 to 3 inches wide, in a low, wide shape.
- Beanie cuff: 1.5 to 3 inches wide. Keep it flat and light so the cuff still folds.
- Bucket hat: 2 to 3 inches on the crown or brim. The fabric is soft, so a lighter patch sits better.
Straw hats can take a patch too, but the weave is stiff and open. Pick a light patch and test your attachment on a spare hat first.
Where should you put a patch on a hat?
The front panel is the classic spot because it's what people see first. Put the patch in the center, and keep it clear of the seams and the eyelets (the small stitched air holes). On a trucker cap, the patch goes on the front foam panel, not the mesh in back.
On fitted hats, keep the patch inside the front panel and off the seams. Sides and backs are good for a second, smaller logo, like a date or a location. Before you decide, cut a paper shape at the exact size, hold it against the hat and look in a mirror.
How do you attach a patch to a hat?
Sew-on is the most secure choice on most caps. Iron-on only works on soft cotton caps, and a hat's curved crown makes it harder than it sounds.
- Sew-on: this holds up best on baseball caps, trucker caps, beanies and bucket hats. Structured caps hold their shape and have a stiff lining behind the front panel, so hand-sewing takes a curved needle and a thimble, and many people hand it to a tailor. Beanies and bucket hats are far easier.
- Iron-on: this can work on cotton twill. The problem is the curve. A flat iron or press has trouble getting full contact across a rounded crown, so the edges can lift. Heat can also warp or melt the polyester foam on a trucker front and the mesh behind it. Stitching around the border adds hold. Our iron-on patch guide walks through the steps, and you can see the backing on iron-on patches.
- Velcro: this is the one to pick for swappable patches. It needs a hook-and-loop panel on the hat, so it suits caps made for it.
- Peel-and-stick: this is for temporary use only. It's fine for a one-day event or a quick test of placement, but it won't hold up through regular wear.
If you want to put a patch on a hat without sewing, Velcro is the better long-term option, and peel-and-stick is the quick, short-term one.
How do you order hat patches for a team or event?
Order the same design in the quantity you need. If the team wears mixed hat styles, such as caps and beanies, keep one design but ask for a smaller size on the beanies. Add a few spares too, since hats get lost and patches get snagged. A few steps keep it simple.
- Send your artwork and pick the patch type and size.
- You get a free digital proof before production.
- Check the proof on your phone at actual size. Hold a real hat next to the screen, or use your paper cutout, to see how it looks.
- Approve it, or ask for changes, before anything goes into production.
There's no minimum order, so you can order as few as 1 piece. That means you can test a single hat before committing to a full run. Production is overseas, shipping is free worldwide, and every order comes with a 14-day guarantee.
What changes the price of hat patches?
Four things move the price: the patch type, the size, how many colors the design uses, and how many pieces you order. A small, simple design in a larger run costs less per piece than a big, detailed one made as a single piece.
If your design is a flat, photo-style image with lots of color, ask about sublimated patches, which are printed straight onto fabric instead of stitched.
What mistakes do people make with hat patches?
- Ordering too big. Past about 3 inches wide, a patch buckles on the curved front panel and lifts at the edges.
- Ordering too small. A patch under 2 inches can look tiny on a cap.
- Putting fine lines or tiny text in embroidery. The thread fills them in. Go woven if your logo has small lettering.
- Skipping the mockup. Cut a paper shape at the real size and hold it on the actual hat.
- Placing the patch over a thick seam. Keep it on the flat part of the panel.
Ready to design your hat patches?
Pick your type and size on the custom hat patches page. You'll see a free digital proof first, and you can start with just one patch.