To design a custom patch, decide where it will be worn, then pick a size that fits that spot. Simplify your artwork to a few solid colors, bold shapes, and large text. Choose a patch type that matches the detail you need, such as embroidered, woven, sublimated, or PVC. Send the design with size, quantity, and backing, then check the free proof.
Designing a patch is mostly about shrinking. Your logo looks fine on a screen, but a patch is small, made of thread or rubber, and usually read from a few feet away. Most first orders go wrong because the art had too much in it, not because it was drawn badly. You don't need design software to get this right, just a few checks in the order below.
Where will the patch go, and how big should it be?
Start with the spot, not the artwork. Size follows placement. These are common ranges makers use, and your garment or team rules may differ:
- Cap front: about 2 to 3 in wide (we lean smaller, see below)
- Chest or pocket: 3 to 4 in
- Sleeve: 3 to 4 in
- Jacket back: 8 to 12 in
For caps, Jerry William, Sales and Marketing Executive at TAP, recommends 2 to 2.5 in on the front panel. Bigger patches tend to buckle on the curve of the crown. TAP checks the proof for cap-curve fit before production. If this is a hat order, our guide to custom patches for hats goes into more detail.
Makers usually quote size as width plus height, divided by two. A patch 3 in wide and 2 in tall is sold as a 2.5 in patch. Ask how a shop measures before you compare quotes. TAP makes embroidered patches from 1 in to 18 in.
What makes a patch design easy to read?
Thread and rubber can't do what ink does. A few rules keep a design clear:
- Use 3 to 6 solid colors. Fewer colors usually read cleaner.
- Skip gradients and shadows on embroidery. Use a printed patch if you need them.
- Keep strong contrast between the art and the background, like white on navy.
- Keep thin lines about 1 mm or thicker.
- Keep key details away from the border so the edge doesn't crowd them.
Think of each color as a separate spool of thread. Every extra shade adds a boundary the machine has to stitch, and at small sizes those boundaries blur together.
How small can text be on a patch?
Text is where most designs fail. Embroidered letters are commonly kept at least about 1/4 in tall. Some makers allow 1/8 in on simple block letters. That's general maker guidance, not a TAP rule, and the free proof is your real check.
Choose bold, plain fonts. Avoid script fonts and tall, narrow letters at small sizes, because the stitches fill in the gaps. If your words are tiny, don't fight the thread. Cut some of them, or switch to a type of patch that holds finer detail.
How do I simplify my design in 3 passes?
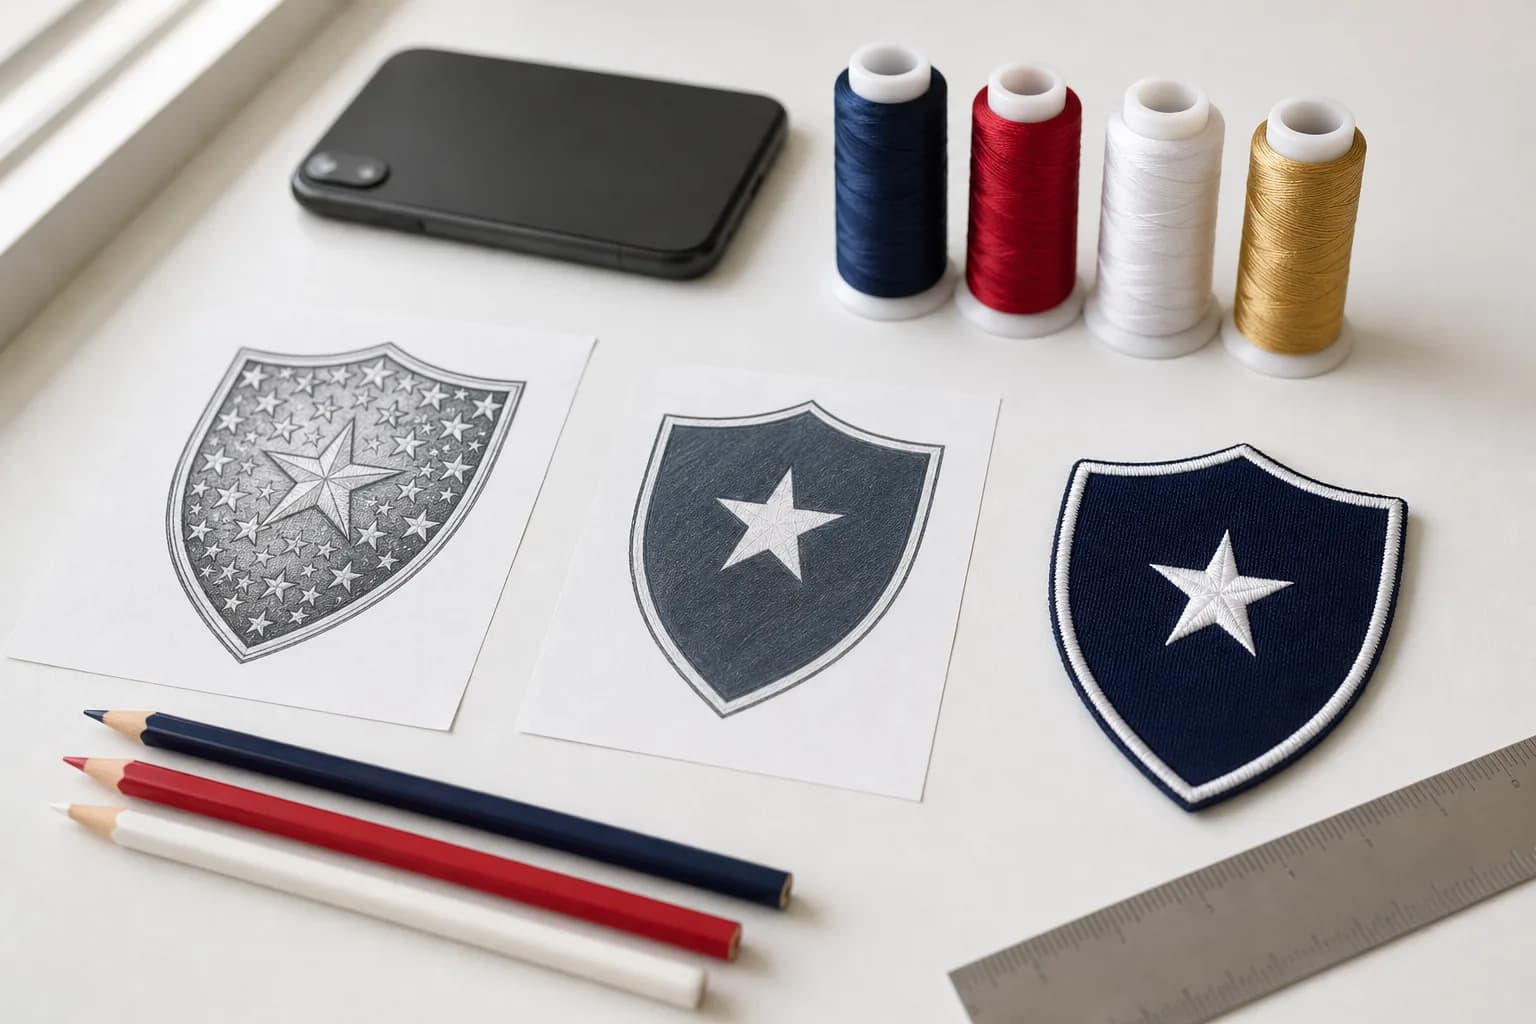
Here's a method that works on almost any logo. Say a club has a shield, a thin outline, six small stars, a blue gradient background, and the motto "Ride together, look out for each other, and finish every mile smiling." Now it has to fit on a 3 in chest patch. Work through three passes:
- 1Drop outlines and tiny details. Remove the thin outline and cut the six stars down to one bigger star, or none.
- 2Merge similar colors. Turn the gradient into one flat navy.
- 3Enlarge or cut text. Twelve words on a 3 in patch would end up well under 1/8 in tall. Keep the club name large and cut the motto to two or three words. Save the full motto for a back patch or another item.
You end up with a navy shield, a white club name, one star, and a short motto. It's less than the original. It's also the version people can read.
How do I test my design at real size?
Before you order, check your design at its real size. It takes about five minutes and catches many problems early.
- 1Print the design at actual size. No printer? Show it on a screen and match the width with a ruler.
- 2Hold it at arm's length. Can you read every word?
- 3Step back to about 6 feet. Can you still tell the shape and main colors?
- 4Squint. Anything that disappears is too faint or too thin.
- 5Fix what failed, then test again.
Then take a photo of the printout with your phone and look at it small. If you can't read it on that thumbnail, it's probably too busy. For a hat, hold the printout against the front panel of the cap.
Which patch type fits my design?
Pick the type after you've simplified, based on what's left in the design.
If your design has bold shapes, a few solid colors, and medium or large text, choose embroidered patches. They have a raised, stitched look and suit caps, uniforms, and jackets.
If it has small text or fine detail, look at woven patches. The thread is finer, so small letters and shapes stay sharper. The finish is flatter than embroidery.
If it has a photo, a gradient, or lots of colors, go with sublimated patches. The art is printed, so it can hold shading. You give up the stitched texture.
If you want a bold, simple design that's raised and rubbery, consider PVC patches. Keep lines thick and skip tiny icons and fine textures, which don't reproduce well. Not sure yet? Browse all patch types, including chenille, leather, silicone, and flex patches.
What border and backing should I choose?
A merrowed border is the thick stitched edge. It suits simple round, square, and shield shapes. A hot-cut or laser edge suits custom outlines, like an animal or a map shape.
On embroidery you may also see coverage options of 50, 75, or 100 percent. Higher coverage means more stitches and a fuller look. An open twill background shows the fabric and uses fewer stitches. Across most makers, size, stitch coverage and the number of colors are what move a quote up or down, so trimming any of them can lower the price.
Every TAP patch comes with sew-on, iron-on, Velcro, or peel-and-stick backing, and Velcro costs nothing extra. Sew-on is the safest choice for most caps and jackets. Our guide to iron-on vs sew-on vs Velcro explains when each one makes sense.
What should I send with my quote request?
Send the design and a few details so the quote matches what you picture. Include:
- Where it goes: cap, chest, sleeve, or back
- Size in inches, width and height
- Quantity (there's no minimum order)
- Backing choice
- Colors, or color codes such as Pantone numbers if you have them
- A reference photo, if you have a similar patch or a rough sketch
For files, vector formats (AI, EPS, SVG, PDF) are best because they scale without blur. Otherwise send a high-resolution image at the final size. If all you have is a sketch, JPG, or photo, TAP redraws it for free, so you can skip the software.
How do I read the proof?
TAP sends a free digital proof before production, and nothing is made until you approve it. Check it in this order:
- 1Spelling of every word and name
- 2Colors against your codes or reference
- 3Size and shape against the spot where it will go
- 4Text size: print the proof at actual size and run the real-size test again
- 5Border and backing
Ask for changes before you approve, not after. If you're still unsure about a detail, say so and ask. TAP also offers a 14-day guarantee and free worldwide shipping. When you're ready, send your artwork or sketch with the details above and ask for a free proof.
FAQs
How do I design a custom patch if I don't have design software?▾
What size should a custom patch be?▾
What file format is best for a patch design?▾
How many colors should I use in a patch design?▾
How small can text be on an embroidered patch?▾
How do I design a patch for a hat?▾
Can I use a photo or gradient on a patch?▾
Will I see my patch design before it's made?▾
Related products
- Embroidered PatchesClassic stitched look for uniforms, clubs, and brand patches.
- Woven PatchesBest for small text and fine detail with a clean woven finish.
- Sublimated PatchesVivid full-color designs with clean edges and sharp detail.
- PVC PatchesDurable rubber patches that handle water, mud, and rough use.